
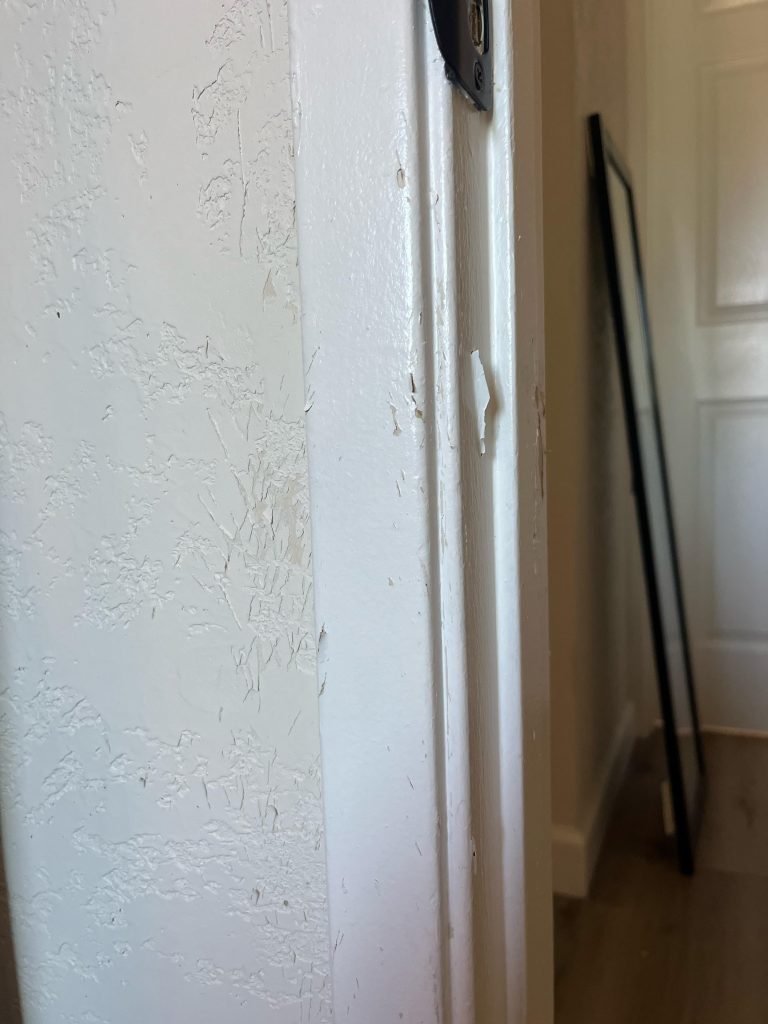
Are those unsightly cat scratches on your walls driving you up the wall? You’re not alone.
Many cat owners face this common problem, and it can be frustrating to see your beautiful walls marred by those tiny claws. But don’t worry, there’s hope! Imagine walking into a room and not being greeted by those pesky scratches.
You can restore your walls to their former glory and keep your feline friend happy at the same time. Curious to find out how? Stick with us, and you’ll discover simple, effective solutions that not only fix the scratches but also prevent them from happening again. Let’s dive in and transform your walls back to perfection!
Identify Scratch Damage
Before you can fix cat scratches on your wall, it’s essential to identify the type and extent of the damage. This helps you choose the right repair method and avoid wasting time or materials. Taking a close look at the scratches can reveal whether a simple touch-up will do or if a more involved repair is needed.
Assess Scratch Depth
Start by running your fingers gently over the scratched area. Is the surface slightly rough, or can you feel a deep groove? Light scratches often only affect the paint layer, while deeper ones may have damaged the drywall or plaster underneath.
Try to measure the scratch depth visually or with a small tool like a toothpick. If the scratch is shallow, you might only need some paint or a wall touch-up pen. Deeper scratches might require filling with spackle or joint compound before repainting.
Check Wall Material
Different wall materials react differently to scratches. Are you dealing with drywall, plaster, wood paneling, or even textured wallpaper? Knowing this affects the repair approach.
For example, drywall scratches often need filling and sanding, while wood paneling might require sanding and refinishing. Wallpaper scratches might be trickier and could need patching or replacement of the damaged section.
Have you checked the material behind your scratches yet? Identifying it early saves frustration and helps you prepare the right tools and products for a smooth repair job.

Credit: www.amazon.ca
Gather Repair Supplies
Before you start repairing cat scratches on your wall, it’s important to gather the right supplies. Having everything ready will save you time and reduce frustration. You’ll want to have tools and materials that make the process smooth and the results lasting.
Essential Tools
Start with basic tools that help you clean and prepare the scratched area. A putty knife or scraper is vital for removing any loose paint or debris around the scratch. Sandpaper, preferably medium to fine grit, smooths the surface for a seamless repair.
You’ll also need a clean cloth for wiping dust away and a paintbrush or roller for applying paint or primer. Don’t forget a utility knife if you need to trim any rough edges. Having a small container or tray for paint makes the process more efficient.
Recommended Materials
Choosing the right materials matters more than you might think. Spackling paste or wall filler helps fill in the scratches and creates a smooth base. Opt for a lightweight filler that dries quickly to avoid long waits.
Primer is essential if your wall has deep scratches or if you’re dealing with a darker wall color. It helps paint stick better and prevents uneven patches. Finally, select paint that matches your wall perfectly—test a small patch first if you’re unsure.
Do you know which paint finish your wall has—matte, satin, or gloss? Matching that finish will make your repair nearly invisible. Gathering these tools and materials first sets you up for a repair job that looks professional and lasts long.
Prepare Wall Surface
Preparing the wall surface before fixing cat scratches is essential to ensure a smooth and lasting repair. Taking the time to properly clean and smooth the area will help the patch or paint adhere better, preventing the damage from showing again. Have you ever tried covering scratches without prepping the surface first? The results often leave you frustrated and needing to redo the work.
Clean The Area
Start by removing any dust, dirt, or loose paint from the scratched wall. Use a mild detergent mixed with water and a soft cloth or sponge to gently clean the area. Avoid harsh chemicals that could damage the paint further.
After cleaning, let the wall dry completely before moving on. This step prevents moisture from getting trapped under patches or paint, which can cause bubbling or peeling later. You want a clean, dry canvas to work on.
Smooth Rough Edges
Scratches often leave jagged edges that make repairs look uneven if not smoothed out. Lightly sand the scratched area with fine-grit sandpaper to create an even surface. This step helps the filler or paint blend seamlessly with the surrounding wall.
Be careful not to over-sand; just smooth the rough parts enough to remove sharp edges. If you skip this, the repair will be obvious and may peel over time. Have you noticed how small details like this make a big difference in your home repairs?

Credit: www.reddit.com
Fill Scratches
Filling scratches on walls helps restore their smooth look. It stops damage from getting worse. Choose the right filler based on your wall type. Proper filling makes walls ready for painting or touch-ups. This section covers two common fillers for different wall materials.
Use Spackling Compound
Spackling compound works well on drywall or plaster walls. It fills small to medium scratches easily. Follow these steps for the best results:
- Clean the scratched area with a damp cloth.
- Apply spackling compound using a putty knife.
- Smooth the surface to blend with the wall.
- Let it dry completely, usually a few hours.
- Sand the area lightly for a flat finish.
- Paint over the spot to match the wall color.
This method is quick and leaves walls looking new.
Apply Wood Filler For Wooden Walls
Wood filler suits wooden walls or paneling. It restores deep scratches and gouges well. Use these simple steps to fix wood scratches:
- Clean dust and dirt from the scratch.
- Press wood filler into the damaged area.
- Shape it with a putty knife to match the surface.
- Wait for the filler to dry fully.
- Sand the spot gently until smooth.
- Stain or paint the area to blend with wood.
Wood filler strengthens the wall and hides damage clearly.
Sand And Smooth
After filling the cat scratches on your wall, sanding is key. It helps smooth the surface and remove rough edges. Sanding creates a clean base for painting or further repair. The right technique makes the patch blend well with the rest of the wall.
Choose Sandpaper Grit
Select sandpaper grit based on the damage size. Use coarse grit (60-80) for deep scratches to remove excess filler quickly. Medium grit (120-150) works well for smoothing the area after coarse sanding. Fine grit (220) finishes the surface and prepares it for painting.
Always sand gently to avoid making new scratches. Test on a small patch first to see how it feels. Replace sandpaper when it wears out for better results.
Blend Repair With Wall
Blend the repair area with the wall to hide the fix. Sand in circular motions to smooth the edges. Feather the repair edges outward for a seamless transition.
Check the surface by running your hand over it. It should feel even and smooth. Use fine grit sandpaper again if needed for a perfect finish.
Proper blending helps the paint cover the repair naturally. This step is crucial for a professional look.

Credit: www.amazon.com
Paint Touch-up
Paint touch-up is a reliable way to hide those annoying cat scratches on your walls. It refreshes the damaged area and blends it with the rest of your wall, making the scratches almost invisible. The key is to carefully match the paint and apply it properly to avoid noticeable patches.
Match Paint Color
Finding the right paint color is crucial. Even a slight difference can make the touch-up stand out. If you have leftover paint from your original wall project, use that first—it’s the best match.
If you don’t, bring a small chip of the wall paint to a paint store. They can scan it and mix a color that matches closely. Remember, lighting affects paint color, so check the sample in different lights before buying a large amount.
Apply Primer And Paint
Before painting, apply a primer to the scratched area. Primer helps the paint stick better and prevents the scratches from showing through. Use a small brush for precise application around the damaged spot.
Once the primer dries, apply the matched paint in thin layers. Avoid thick coats that can drip or look uneven. Multiple light layers blend better and dry faster, giving you a smoother finish.
Do you have any special tricks for blending paint on walls? Sharing your tips could help others restore their walls like a pro.
Prevent Future Scratches
Preventing future cat scratches on your walls is key to maintaining a beautiful home. Once you’ve repaired the damage, focusing on prevention will save you time and effort. You can protect your walls and keep your cat happy by making some simple adjustments.
Use Protective Covers
Protective covers act as a barrier between your cat’s claws and your walls. You can apply clear plastic sheets or specialized wall guards that stick onto the surface without damaging the paint.
These covers are easy to clean and replace when needed. You might also try double-sided tape on the walls near scratching spots—cats usually dislike the sticky feeling and avoid those areas.
Have you noticed your cat prefers certain spots? Focus protective covers there first. This targeted approach works better than covering entire walls.
Train Your Cat
Training your cat to scratch designated items can redirect their behavior effectively. Provide scratching posts or pads close to the problem areas so your cat can satisfy their scratching instinct.
Use catnip or toys to attract your cat to these posts. Reward them when they use the right spot to encourage consistent behavior.
If your cat starts scratching the wall, gently move them to the scratching post. Consistency is important—over time, your cat learns where scratching is acceptable.
Do you pay attention to your cat’s favorite textures or materials? Offering similar textures on the scratching posts can make them more appealing than your walls.
Frequently Asked Questions
How Do I Repair Cat Scratches On Painted Walls?
Clean the scratched area with mild soap and water. Apply spackle or wall filler to fill the scratches. Sand it smooth once dry. Finally, repaint the area to match the existing wall color for a seamless finish.
What Materials Are Best To Fix Wall Scratches From Cats?
Use lightweight spackle or wall filler for minor scratches. Fine-grit sandpaper smooths the surface. Matching paint or touch-up markers restore color. These materials are affordable and effective for quick wall scratch repairs.
Can I Prevent Cat Scratches From Damaging Walls?
Yes, place scratching posts near walls to redirect cats. Use protective wall covers or double-sided tape. Regular nail trimming and nail caps also reduce wall damage. These methods help protect your walls from future scratches.
How Long Does It Take To Fix Cat Scratches On Walls?
Minor scratches can be fixed in under an hour. Drying time for spackle or filler varies from 30 minutes to a few hours. Painting may require additional drying time. Overall, the process is quick and easy.
Conclusion
Fixing cat scratches on walls takes patience and simple steps. Start by cleaning the damaged area well. Use filler or putty to cover deep scratches. Sand the surface smooth once dry. Choose paint that matches your wall color. Apply paint in thin, even layers.
Let each layer dry before adding another. Protect walls by trimming your cat’s nails. Place scratching posts nearby to keep cats busy. Small repairs can keep your walls looking fresh. A little care goes a long way in home upkeep.

Lily Purrington is the founder of MyKittyPicks.com, a cozy corner of the web dedicated to helping cat lovers discover the best cat products, furniture, toys, and home decor ideas.
A lifelong cat enthusiast, Lily shares trusted tips, honest product recommendations, and stylish inspiration designed to keep kitties happy and homes beautiful.
Her mission is simple: to bring together practical advice and purr-fect picks that make life better for cats and the people who love them.


